
Kids love to cook, and cooking is a great activity for this summer. One of my best “pro” tips in doing food projects with kids is to decide, going in, that they don’t have to do it your way. They can do it their own way. The goal of the project is to have fun. Will there be a mess at the end? Likely – but if you expect it, it’s easier to take. It helps to cover the table with a plastic tablecloth, to be thrown out at the end, which makes clean-up a bit easier.
The age of the kids
will determine how much responsibility they can take on. As I often say, the
more they do in the kitchen, the more likely they will eat the finished product.
(This is especially true of picky eaters.) So if they wash the peppers, cut up the
cucumbers, or crack the eggs and toss them into a bowl, they are now invested
in this project and are much, much more likely to eat it.
Additional tip: If
you are doing “Mommy camp,” I find having a schedule is useful. We have a
rotating “guest chef” on Tuesday, make a dessert on Thursday, and bake challa
on Friday.
I hope you enjoy
making these dishes with your children.
Tater Tot Grilled Cheese!
This
recipe is fun, and easy for kids to make themselves, and it’s gluten-free. You
can make your own shredded potatoes for this, but frozen Tater Tots work great
and are fun to use.
12 Tater Tots per sandwich
1/2 c. shredded cheese per
sandwich
Tomato slices (optional)
Heat a large nonstick skillet
over medium heat and grease it with cooking spray. Arrange 6 tater tots in a
rectangle, side by side, on one side of the skillet. Repeat to make another
rectangle with remaining Tater Tots on the other side of the skillet.
With a large spatula (metal
works great) press down hard on each Tater Tot rectangle to form a flat square
patty. You may need to press down repeatedly to help the Tater Tots hold
together. Cook until the bottom and sides of the tater tots begin to crisp,
about 3 to 5 minutes. Sprinkle each square with cheese (this helps everything
stay together!), then cover the pan with a tight-fitting lid and continue
cooking until the cheese is melted.
Use a spatula to carefully flip
one cheesy square onto the other to form a sandwich. Press down again with the
spatula and continue to cook the sandwich until both sides are crispy, about 3
minutes more.
If you want, you can add the tomato slices after
you put the shredded cheese on top.
Make-Your-Own Pizza
We
love pizza in this house. We like pizza toast, pizza bagels, calzones – even
regular pizza pie! If you are talking bread, tomato sauce, and cheese, we’re
there! One amazing thing about making your own pizza is you can make it exactly
how you like it, and you can add a bunch of veggies into this mix. And, as
mentioned above, if the kids are prepping these veggies, they are more likely
to eat them.
This is a very flexible recipe. You can buy frozen
pizza dough (Rosendorff’s or Trader Joe). We use
2 bell peppers, sliced
1 c. broccoli florets
1/2 small red onion, thinly sliced
1 c. cherry tomatoes
Extra-virgin olive oil
1 tsp. kosher salt
1/4 tsp. freshly-ground black
pepper
All-purpose flour, for dusting
surface
1 lb. pizza dough, at room
temperature
1 c. ricotta
1 c. shredded mozzarella
Preheat oven to
400° F. Toss peppers, broccoli, onion, and cherry tomatoes with olive oil in a
large bowl, and season with salt and pepper. Place on parchment-paper-lined baking
pan. Roast until tender and tomatoes are bursting, 18 to 20 minutes. Remove and
increase oven temperature to 500°.
Meanwhile, brush
an oven-proof skillet with olive oil. On a floured work surface, use your hands
to roll out dough until it’s the circumference of your skillet. Transfer to
skillet and brush dough all over with olive oil, leaving a ½-inch border for
crust. Dollop spoonfuls of ricotta on dough and sprinkle with mozzarella. Top
with roasted vegetables and drizzle with olive oil. Sprinkle with salt. Bake
until crust is crispy and cheese is melted, about 12 minutes.
Banana Pops
Do
you have extra bananas? You can use up a bunch of them with this recipe. The
whipped cream is extra. I find a lot of people will eat anything if it has
whipped cream on it, although, honestly, we do not have a problem with eating
this without the whipped cream. It’s just that whipped cream is a special treat
in our house. We get it for birthdays; that’s how special it is. It also seems
that if we open some whipped cream, it will be finished in the same sitting.
(Is that just us?)
4 ripe and firm bananas
8 popsicle sticks
1 1/4 c. chocolate chips
1 T. coconut oil
1/2 c. rainbow nonpareil sprinkles
(optional)
Whipped cream, for serving
(optional)
Line a large
baking sheet with parchment paper and set aside. Cut the ends off of each
banana to level the sides, then cut in half. Insert a popsicle stick into each
banana half and place on prepared baking sheet. Freeze for 2 hours.
In a medium
microwave-safe bowl, combine chocolate chips and coconut oil, and microwave in
30-second intervals, stirring in between, until completely melted. Pour
sprinkles into another small bowl. Dip the top of each frozen banana in
chocolate, then roll the melted chocolate tip around in sprinkles. Return to
baking sheet and freeze until the chocolate is firm, about 15 minutes. Top each
pop with whipped cream and garnish with a maraschino cherry.
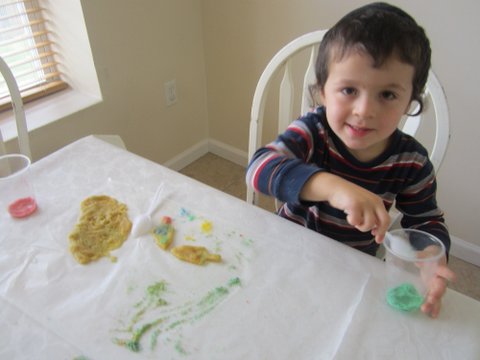
Earth Cookies
If
the kids can make the dough, that’s fabulous! If they can mix, also great. If
not, make the dough beforehand. I find my kids just love adding food coloring
to dough, so that’s one of the high points of this activity. It does mean being
slightly cautious with what everyone is wearing and having some wipes at the
ready just in case. Also, before you start these Earth cookies, you can talk
about the Earth! How much of our gorgeous planet is covered with water? How
much with land? (Hint: Guess why the green dough is only ¼ of the
total!) If you have a globe or map, take it out and have your kids hypothesize what
would happen if there were more water or land. (I love asking what-do-you-think-type
questions that have no wrong answer. These questions encourage more answers.
Sometimes, if there is only “one right answer” and the child (or adult!) doesn’t
answer it correctly, they are much more hesitant to answer questions in the
future.
1 c. butter (2 softened sticks)
1 1/2 c. granulated sugar
1 large egg
2 1/4 c. all-purpose flour
1/2 tsp. baking powder
1/2 tsp. salt
1 tsp. vanilla extract
Preheat oven to
350 F°. Line cookie sheets with parchment paper or a nonstick baking mat. Cream
together butter and granulated sugar until light and fluffy, about 3 minutes
(or, if you do not want to pull out the mixer, just mix by hand. The end
project will be lighter with a mixer, but is not strictly required.
Add egg and mix
until well-combined. Stir in flour, baking powder, and salt until
well-combined. Stir in vanilla. Split the dough, putting one-quarter of it
into one bowl and three-quarters in a second bowl. Add 6 drops of green food
coloring to the smaller one, and 6 drops of blue food coloring to the other. Mix
until combined and takes on the color you like. (The blue should look like the
ocean and the green like land.)
Pull out pieces
from each ball of dough, about a tablespoon all together, and roll into a ball.
Do not knead, as having some pieces blue and some green makes it look like the Earth.
Place the balls on the lined cookie sheet and bake 8 to 9 minutes (trying to
avoid browned edges).