Many of us wake up to chaos – the morning decibel level in my home resembles that of an airplane on the tarmac – and stagger to the kitchen for our first cup of coffee. There’s nothing like that rich steamy brown brew to restore our sense of calm. And there’s nothing – nothing – like a cup of coffee brewed from home-roasted coffee beans.
Before you say, “Did I hear him right?” let me explain: The primary characteristic of quality coffee is freshness. Fresh is “king.” From shortly after roasting, coffee freshness begins a descending arc, and as with many foods, each step of processing shortens its lifespan. The “rule of 15” states that raw, green coffee beans remain fresh for 15 months, roasted coffee is fresh for 15 days, and ground coffee is fresh for 15 minutes. This certainly isn’t Torah mi’Sinai, but gives you an approximation of the importance of freshness and how quickly coffee loses its key variable.
I understand how popular the Keurig has become, and trust me, I get it. Ease is the name of the game for most people. But you must know that the K-cup coffee pod contains coffee that may have been ground during the Eisenhower administration! In other words, it’s far from fresh.
While changing your coffee habits seems overwhelming and possibly unnecessary, it actually takes only several small, inexpensive steps to substantially improve your home coffee. If you need further motivation, remember that a huge factor in dumping your Keurig or Nespresso – or not buying one to begin with – is cost. These machines typically start at about $100 to purchase, and the price of Keurig pod coffee runs 40 to 80 cents per cup – or $40 per pound! In contrast, whole bean coffee, even from top quality producers like Peet’s, typically runs $8 to $12 a pound. And buying and roasting your own beans can be as low as $4 per pound. For an average family, using a Keurig machine can amount to an extra several hundred dollars per year for their coffee. That’s a very high price for convenience.
When Is a Bean Not a Bean?
Improving your coffee experience can be easy. Start with two simple steps: 1) Buy whole beans, and 2) buy a coffee grinder. Even a cheap grinder will exponentially improve the flavor and aroma of your coffee. There are two types of coffee grinders: the simple, chopping-blade grinder, which can be had for $5, and the much higher-quality burr grinder, which uses two opposing, abrasive surfaces to crush the bean, resulting in a much better and more even grind. They can be bought for as little as $20 for a manual grinder, or about $35 for an electric one. (I’d suggest the electric one, unless you prefer using some serious elbow grease.) Even if you choose to stick with your Keurig, get your hands on one of those reusable pods I’ve seen around, and start grinding your own coffee to fill it. This will save you money and greatly improve your cup.
But if you want to really revolutionize your coffee experience, it’s time to learn about home coffee roasting. Now, obviously, this isn’t for everyone, but if you’re a do-it-yourselfer who loves coffee, read on.
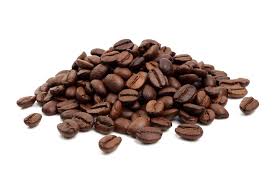
Let’s start with the coffee bean itself. Well, first off, it’s not a bean. It resembles a bean, and that name has stuck. But, truthfully, it’s the seed of the coffee plant - the pit inside the coffee fruit - and is often referred to as a cherry. The coffee berry is picked, dried (usually through the age-old sun-drying method), and processed to remove the seed from the husk. It then resembles a small, green bean, which, not coincidentally, is referred to as “green beans” in the industry. It is the roasting process that changes the color of the bean from green to some shade of brown, depending on how long it is roasted.
Coffee can only be grown properly between the Tropics of Cancer and Capricorn, in mountainous areas. Unfortunately, much of the world’s coffee comes from dangerous and war-torn areas of Africa, South and Central America, and Asia. The only U.S. state to grow quality coffee is Hawaii (which produces the legendary Kona coffee, which can cost upwards of $50 a pound), so here’s where you (and I) should probably stop dreaming about a Northwest Baltimore bumper coffee crop.
Pop Goes the Coffee Bean
There’s nothing as authentic and fresh as homemade food. This applies to coffee, as well. Until World War I, most coffee was indeed home-roasted, before the advent of commercial roasting and the invention of instant freeze-dried coffee. With the recent surge in all things homemade, fresh, and healthy, home-roasting has become increasingly popular. Roasting your own coffee at home is easy and will give you, with a little practice, the best cup of coffee you’ve ever had.
There are endless ways to roast at home, and people have created all kinds of gizmos to make home coffee roasting more efficient. The most typical methods include old hot-air popcorn poppers (my method of choice), barbecue roasting (often using a drum, but even without), a skillet, a stove-pop popper, or even in the oven. But there are two drawbacks to roasting inside your home, however: It generates a lot of smoke, as well as chaff that blows off the bean during the roasting process. I use an old hot-air popcorn popper, but there is one important feature that must be present. The popper should blow its air from the side of the basin, and not from the bottom. This allows the beans to circulate which makes for even roasting and prevents burning. The main drawback for the popcorn popper method is that it limits the roast to about a half-cup of beans per roast.
Still, roasting can be done in less than 10 minutes, and one roast will provide you enough coffee for at least a few days, depending on how much you drink. A drum roaster in a repurposed barbecue would allow you to roast far more beans at once. You can also buy a coffee roaster intended for the home roaster. These have varying attributes and will cost you anywhere from $100 to $500 but will allow you to roast with more accuracy, as you can control variables such as time and temperature. It will also roast a much larger quantity at once. I’d certainly recommend that anyone start with the popcorn popper method, as the poppers are cheap, roasting is quick and pretty easy to do once you get the hang of it.
The West Bend 82416 Air Crazy 3.5 Quart Corn Popper is found on Amazon for $22. Again, the primary information to determine is whether the air vents on the side and not from the bottom. (If you look in the questions section of most of these hot-air popcorn poppers on Amazon, you’ll generally find an answer to this question.) Make sure to roast without the plastic top, as it will melt. Air poppers allow you to choose your roast level, from a light “city roast” all the way to a dark, full French roast. Practice will improve your roasts, and you will learn to end your roast based on sound as well as sight, as the roast goes through two different “cracking” stages.
Selecting your green beans is a fun part of the process, and you don’t have to look for a hechsher. According to the Star-K website, “Being that [green] coffee beans are inherently kosher, and water is the only substance the beans have come into contact with until this point, no kashrus concerns exist.” (For more in-depth information on coffee and kashrus, read the full Rabbi Boruch Beyer article at http://www.star-k.org/articles/articles/1142/knowing-your-beans-the-kashrus-of-coffee.)
Nowadays there are many online retailers of green beans, and beans will typically run $4 to $6 a pound (far less than any premium roasted beans you will find at the store). Some of the more well-known green bean retailers include sweetmarias.com, coffeebeandirect.com, and happymugcoffee.com (my usual source). Many of these distributors will sell you a “starter variety pack” with beans from various regions around the world. You can even buy decaf if, strangely, that’s your thing! It’s interesting to buy beans not only from exotic countries but from small, fair-trade farms with intriguing histories.
The roasting process consists of several stages, which, as I said, you’ll learn to identify through sight, smell and sound. They are:
- The yellowing or endothermic stage: As the beans dry, they begin to smell like grainy toast (Light Cinnamon Roast). Pronounced acidity, no real roasting flavors.
- First crack: At about 400° F, beans double in size and turn light brown (American or City Roast). More balance to the flavor and aroma.
- Medium Roast or pyrolytic stage: At 401° F to approximately 428° F, the coffee turns medium brown (Full City or Vienna Roast), and the sugars caramelize. Heavier roasted flavor, some acidity is lost.
- Second crack to dark roast: This occurs at 428° F to 446° F and is characterized by short, high-pitched snapping noises. The color will turn medium to dark brown, and nearing the end of this second crack, the beans will become oily in appearance (French or Italian Roast or Espresso Roast). Bittersweet, smoky flavors predominate, without acidity or floral notes. If you go too far past second crack (and it happens quickly), you will end up with charcoal and useless beans.
A common misconception is that dark roasts carry the most caffeine per cup. It is actually an inverse ratio, as the light, breakfast roasts are the most heavily-caffeinated. Additionally, Robusta coffee has about twice as much caffeine than Arabica coffee, but is far less commonly roasted, as Arabica is sweeter and far more nuanced. You will find high concentrations of the much cheaper (because it is far easier to grow) Robusta in your average gas station coffee, or in the typical Folgers grind. Keep this knowledge handy for an especially tough Monday morning!
Brewing Know-How
Now, let’s quickly talk about how to prepare your freshly roasted, freshly ground beans. While the Keurig and its counterparts seem easy enough, brewing with your standard drip brewer is not much more complicated and will produce a far fresher cup. You can also use one of two age-old methods. These methods are very cheap relative to a Keurig and yet produce a far more balanced, more flavorful cup. With the pour-over method, you simply pour hot water over the coffee in a simple cone filter and let it drip into the cup. With the French press method, you push a plunger to force the coffee grounds out of the finished liquid. You can walk in the fanciest coffee shops in the world and see these methods being employed. Pour-over filters start at about $5, and a French press will cost $10 to $20. Both are extremely durable and simple to clean.
The best way to store your coffee is in an airtight container that stays cool and dark. While it may look cool to use a glass container, the light will damage the beans. It’s another myth that freezing coffee helps maintain its freshness. Coffee absorbs moisture, odor, and taste, and can certainly suffer from freezer burn. So your best bet is to get an opaque airtight canister and keep it in a cool but still convenient area in your kitchen. Great canisters can be bought for $15 on Amazon.
I hope that I’ve convinced you to try to roast and brew your own coffee, and that you never think about coffee in the same way again!
For comments or questions, Kenny Friedman can be reached at dr.kenneth.friedman@gmail.com.